[ad_1]
You’ve mastered making cocktails at residence and doubtless even crafted your individual cocktail components. However have you ever tried residence brewing or fermentation? Working with yeast and siphons could sound and look intimidating. However Emma Christensen covers the fermentation course of in her ebook, Laborious Seltzer, Iced Tea, Kombucha, and Cider. All you want are a few weeks, tools, and gumption. Right here, she breaks down the way to ferment and even affords a few of her professional suggestions.
As a beginner, you may make a large number, however that’s simply a part of the educational course of, writes Christensen. Nevertheless, simply to be protected, begin by bottling water simply to get a really feel for a way the tools, just like the siphon and bottle capper, work. And for these nervous in regards to the sanitizing and bottling steps, Christensen suggests studying these sections of her ebook fastidiously and watching instructive movies on-line.
Days 1 to six
Sanitize your tools
Earlier than you contact a single ingredient, clear your tools. Scrub every part with soapy water and observe that by sanitizing it. Do that in your fermenter, which must be sanitized anyway, or some other massive container the place you’ll be able to submerge the tools, such because the air locks and spoons, within the sanitizer for a minute or two. Be certain that to additionally sanitize the mouth of your fermenter. Sanitized tools can be utilized moist or dry. “After you’re carried out sanitizing all of your tools, save a small container or a sprig bottle of sanitizer in case you will have any last-minute sanitizing wants,” Christensen suggests.
Combine your sugary base
As soon as your fermenter is pristine, pour the sugar in and canopy it with the liquid base of your recipe. Sprinkle yeast throughout the liquid’s floor. (Christensen prefers champagne yeast as a result of it’s simple to work with and doesn’t impart a lot residual taste.) After a few minutes when the grains have dissolved, combine it with a sanitized whisk for about 30 to 60 seconds till there’s a bit of froth. “Whisking your sugary base incorporates oxygen into the combination, which is useful to the yeast and helps guarantee a robust fermentation,” Christensen explains. Now seal the fermenter with the lid and rubber stopper. Fill the air lock with both your reserved sanitizer or vodka.
Retailer your fermentation combination
Place your fermenting brew someplace darkish and somewhat heat with not a lot site visitors, like a kitchen cabinet or laundry room. You’ll need it out of the best way however nonetheless have the ability to control issues. “If it’s essential to retailer your beverage on the counter whereas it ferments, wrap it in a thick layer of towels to guard it from the sunshine,” she recommends. And simply to be protected, set the fermenter on a towel within the occasion that completely satisfied yeast pushes liquid out of the air lock.
Add yeast vitamins
Regardless that the fermentation course of is fingers off for probably the most half, it’s essential to feed the yeast vitamins. “Yeast vitamins assist preserve your yeast completely satisfied and your fermentation vigorous!” she says. In any other case, harassed yeast could make for off-flavors or cease the fermentation. Christensen feeds her yeast 1 teaspoon of diammonium phosphate and food-grade urea (combined with just a few tablespoons of heat water) per gallon over three days. Pour the yeast nutrient into the fermenter, gently mixing it in. Repeat over the following two days.
Days 7 to 14
Add and regulate flavors
After every week or so when the fermentation has slowed down, it’s time so as to add some flavors, reminiscent of liqueurs, fruit, or herbs. The components can then be fastidiously added to the liquid within the fermenter in a sanitized mesh bag. Gently swish it round and return the fermenter to its space for storing. After just a few days, style take a look at your brew with a small sanitized measuring cup. “Add extra [flavoring] in the event you’d like a stronger taste and bottle whenever you’re proud of the way it tastes,” she says. This course of can take a minimal of three days. Nevertheless, Christensen writes {that a} “week of infusion is often center floor for extracting the very best taste and staying on schedule.”
Bottle
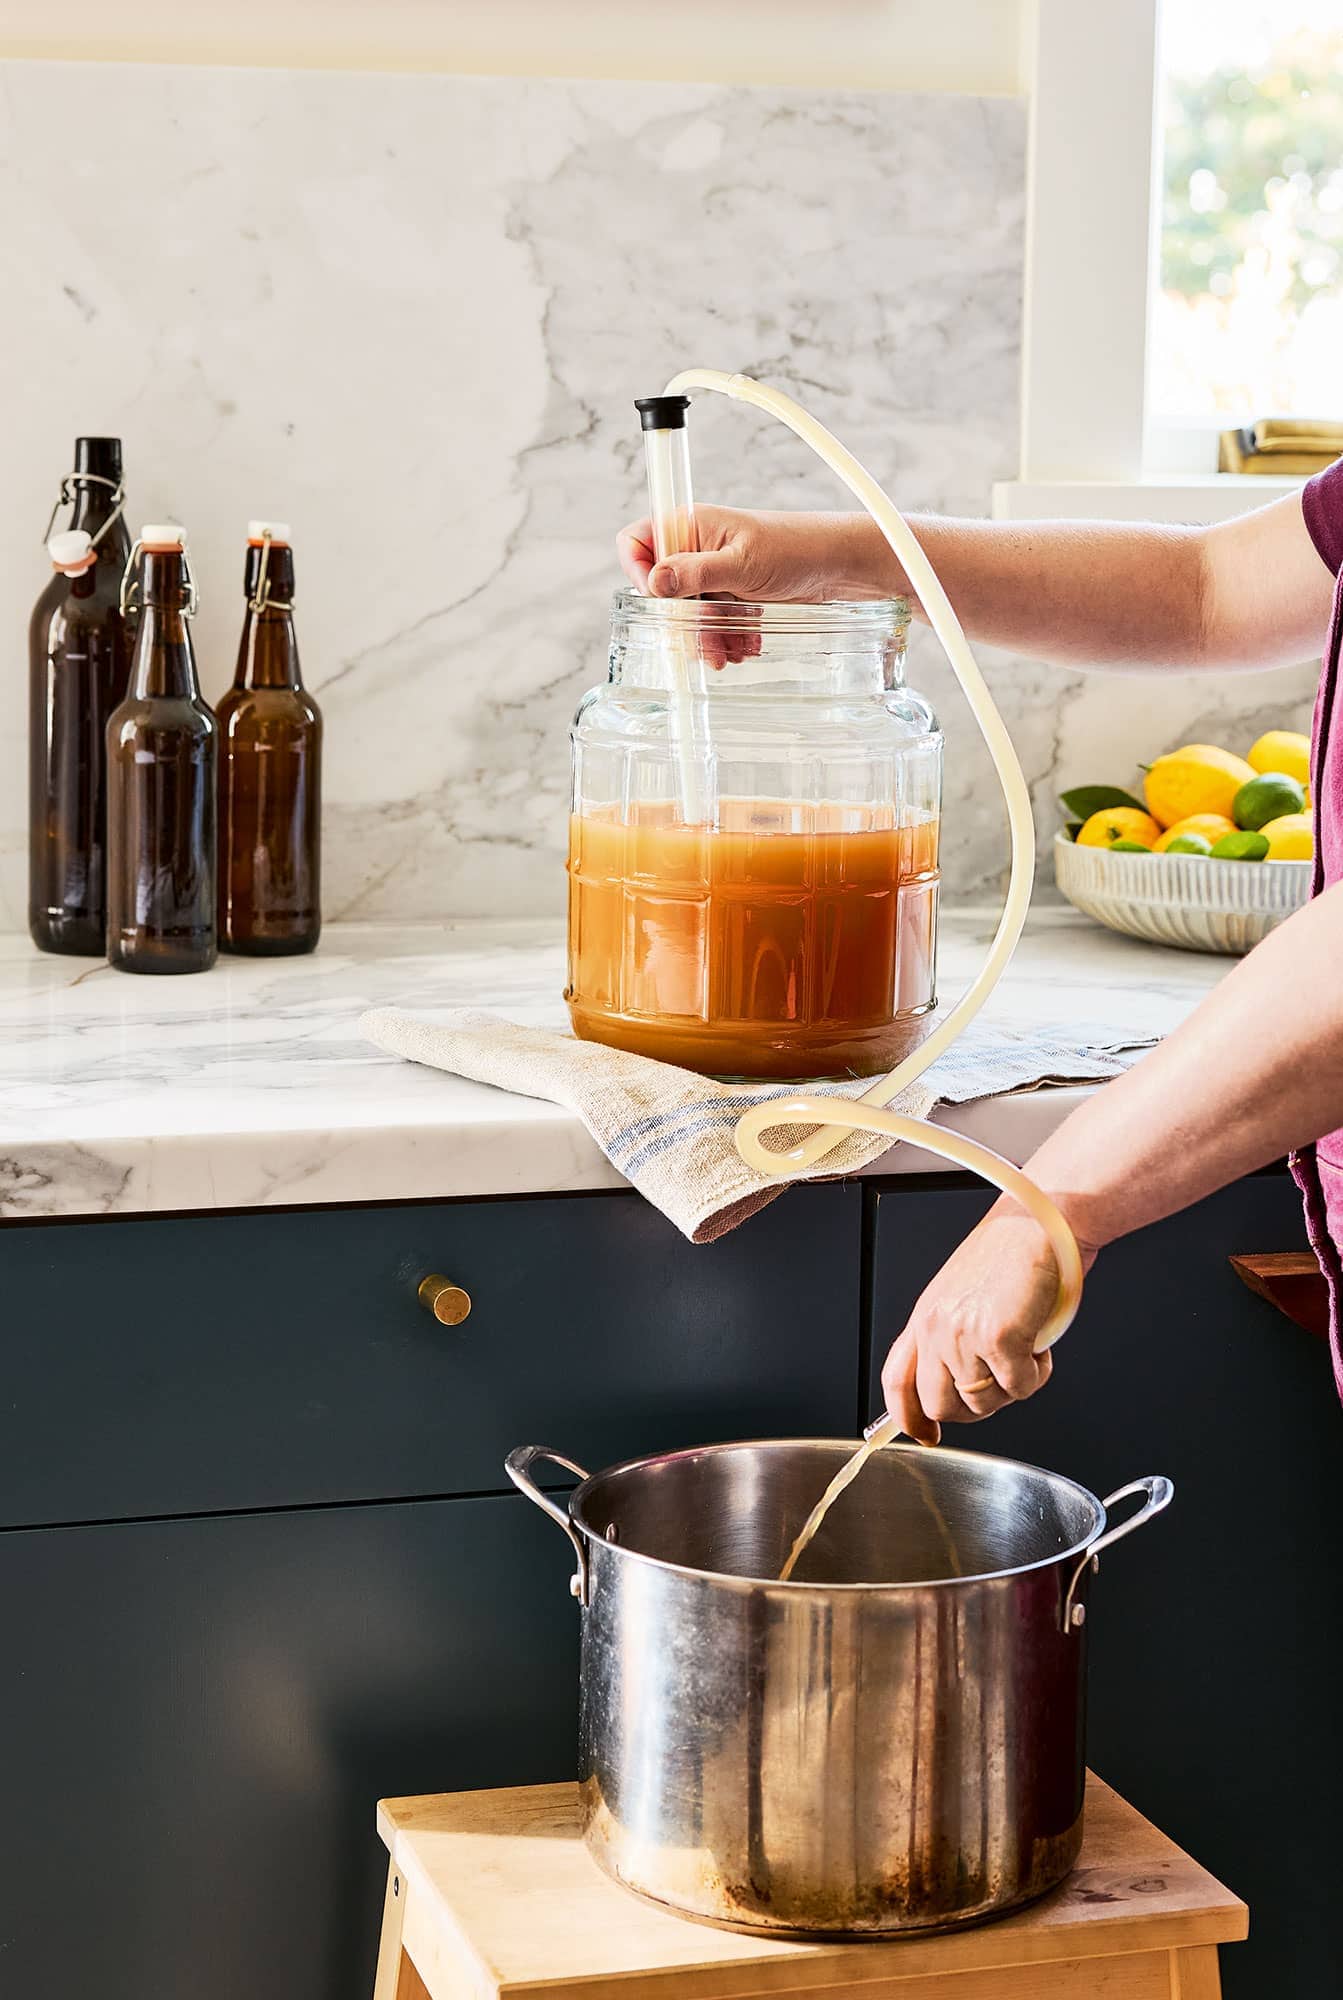
When the combination has stopped fermenting (i.e. it’s now not effervescent within the air lock), it’s time to bottle it up. You positively don’t need to bottle it whereas it’s nonetheless fermenting else you threat cracking the bottle and an enormous mess to scrub up. In case you’re unsure, merely wait just a few extra days to bottle. When you’re prepared, place a sanitized stockpot on a desk or chair a couple of foot or two under the fermenter. Add corn sugar dissolved in a half cup of water to the sanitized stockpot. This can carbonate the drink.
After eradicating the fermenter’s lid, gently insert the autosiphon alongside one facet of the fermenter till it hits the underside. Place the opposite finish of the tube within the stockpot. Maintain it in place with one hand to stop it from leaping round, and, with the opposite, pump the autosiphon just a few occasions to get the liquid flowing. Siphon all of the liquid from the fermenter. When nearing the underside, tilt the vessel to seize as a lot liquid as potential, forsaking the stable components and the sludge.
Subsequent, place the stuffed stockpot on the counter with the autosiphon and put the bottles the place the stockpot was under. Christensen places the bottles on a tray to include any potential spillage. When you connect the bottle filler to the siphon tube, insert it within the bottle, urgent the tip to the underside. Then pump the autosiphon to start out the movement. When the bottle is stuffed as much as its lip, put out the bottle filler. “As soon as the filler is faraway from the bottle, it’s going to depart the precise correct amount of empty headspace within the bottle so the liquid can carbonate,” she writes. Repeat this course of till there isn’t a liquid left within the stockpot.
To cap the bottles, first place a clear dish towel on the counter to stop the bottles from sliding whenever you cap them. Put a sanitized bottle cap over the bottle’s mouth and the center of the bottle capper’s round half over the bottle cap. Press down till the capper’s handles are parallel to the counter.
Retailer your bottles
Hold your bottled brew in a field so not solely are they simple to move however they’ll include any surprising messes from overcarbonation. Retailer the bottles in a darkish place at room temperature, ready every week earlier than you crack one open. “These home made drinks are supposed to be consumed recent, however they are often saved for as much as 3 months with none vital change in high quality or taste,” Christensen writes.
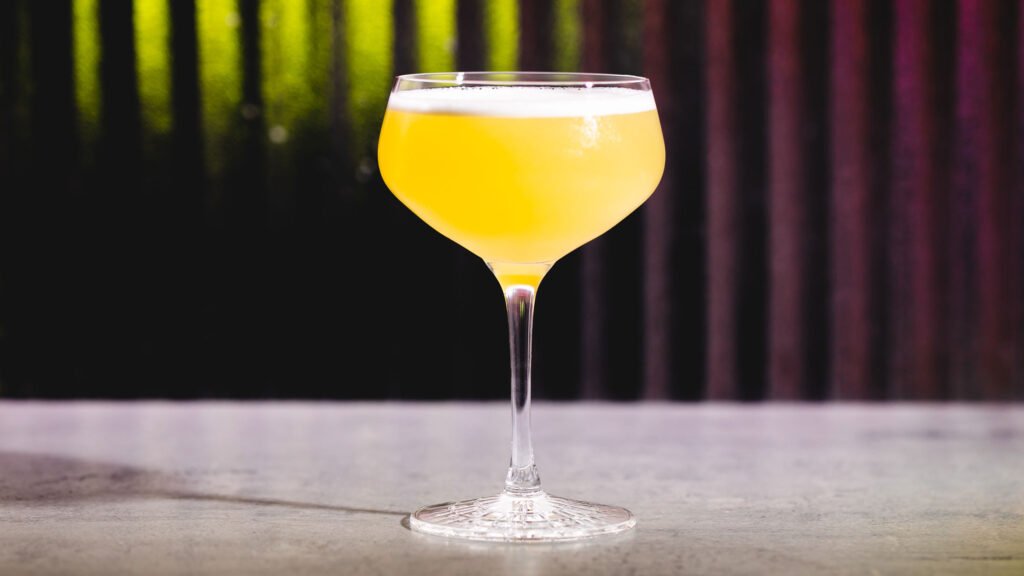
Get pleasure from your home made drink
Now the second of fact: time to style your creation. “In case your drink isn’t as candy as you’d like, add just a few tablespoons of easy syrup to your glass,” suggests Christensen.
Pineapple Laborious Seltzer
1/2 tsp. champagne yeast
1 tsp. yeast nutrient
1 lb. recent or frozen pineapple chunks
Easy syrup (elective)
Instruments: fermenter, air lock, whisk, massive pot, siphon, bottle filler
Garnish: Recent pineapple wedges
Day 1Sanitize your fermenter, air lock, and whisk. Within the fermenter, mix 1 gallon of water, 12 ounces of the corn sugar, and the champagne yeast. Whisk till the corn sugar is dissolved and the liquid is foamy on high, 30 to 60 seconds. Seal the fermenter, fill the air lock with sanitizer, and insert it into the fermenter. Place the fermenter someplace darkish, barely heat (70° to 80°F), and out of the best way. It is best to begin to see indicators of fermentation (like effervescent within the air lock) inside 24 to 48 hours.
Day 2In a small, sanitized measuring cup, dissolve 1/2 tsp. of the yeast nutrient in 2 Tbsp. of heat water. Add to the fermenter, reseal, and exchange the air lock. Swirl gently to distribute and return to your fermentation spot.
Day 3In a small, sanitized measuring cup, dissolve 1/4 tsp. of the yeast nutrient in 2 Tbsp. of heat water. Add to the fermenter, reseal, and exchange the air lock. Swirl gently to distribute and return to your fermentation spot.
Day 4In a small, sanitized measuring cup, dissolve the remaining 1/4 tsp. of yeast nutrient in 2 Tbsp. of heat water. Add to the fermenter, reseal, and exchange the air lock. Swirl gently to distribute and return to your fermentation spot.
Days 5 to 14Lively fermentation will peak round Day 5 after which largely end round Day 7. Anytime between Day 7 and Day 10, add the pineapple to the fermenter and infuse for a minimum of 3 days or as much as 7 days.
After including flavorings, you might even see renewed indicators of fermentation, although much less vigorous than initially. When you see no extra indicators of fermentation (like bubbles within the air lock), you’ll be able to assume fermentation is full. Wait one other 24 hours to be protected, then proceed with bottling.
Bottling DayWhenever you’re able to bottle, sanitize a liquid measuring cup, spoon, massive pot (1 gallon or bigger), siphon, bottle filler, bottles, and caps. Within the measuring cup, mix the remaining 1 oz. of corn sugar with a 1/2 cup of water and stir to dissolve. Pour this sugar water into the pot.
Siphon the seltzer into the pot with the sugar water, forsaking any solids. Connect the bottle filler to your siphon, switch the arduous seltzer into the bottles, and cap.
Retailer someplace cool, darkish, and out of the best way for 1 to 2 weeks to carbonate, or for as much as 3 months. Chill earlier than having fun with and serve with garnish if desired. For a sweeter drink, add a splash of straightforward syrup earlier than serving.
Reprinted with permission from Laborious Seltzer, Iced Tea, Kombucha, and Cider by Emma Christensen. Copyright © 2025 by Emma Christensen. Images copyright © 2025 by Erin Kunkel. Revealed by Ten Pace Press, an imprint of the Crown Publishing Group, a division of Penguin Random Home LLC, New York.
[ad_2]